
Welcome to our comprehensive guide on wall rendering, tailored specifically for homeowners in the UK. Whether you're looking to enhance the exterior appearance of your home or improve its insulation rendering can be an effective solution. In this guide we'll walk you through the basics of wall rendering including the materials needed preparation steps and the actual rendering process.
Wall rendering is the process of applying a mixture, typically made of sand, cement, and lime, to exterior walls. This coating not only gives your home a fresh new look but also provides additional protection against weather elements.
Remove any dirt, moss, or loose material from the wall. This ensures the rendering mixture adheres properly.
Fill in any cracks or holes in the wall. For larger damages, consider seeking professional help.
Apply a primer if necessary, especially for smooth surfaces to enhance adhesion.
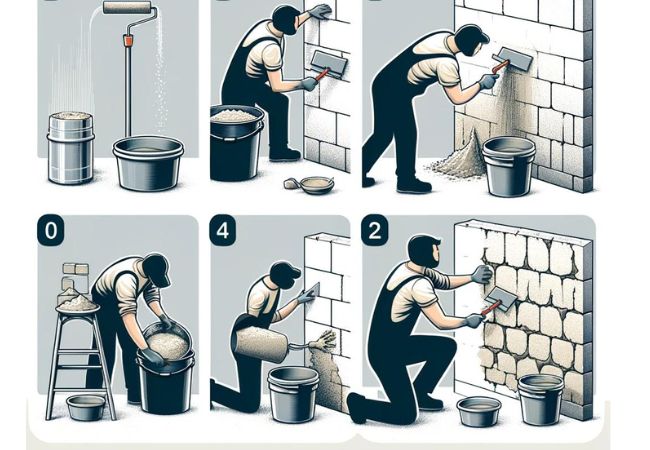
Typically, a standard mix ratio is one part cement, four parts sand, and a small amount of lime or plasticiser.
The mixture should be of a workable, paste-like consistency. Add water gradually and mix thoroughly.
Apply the first layer using a trowel and level it out. Once slightly dried, scratch the surface with a tool for better adhesion of the next layer.
Apply the second coat, ensuring it's smooth and even. Use a float to achieve a flat surface.
The final coat can be a finer mixture or a different color. Apply it smoothly for a polished finish.
Allow the render to dry slowly over a few days. Avoid direct sunlight and rain during this period.
Regularly check for cracks or damages. Clean the surface yearly to maintain its appearance.
Rendering your walls can significantly improve the look and resilience of your home. By following these steps you can achieve a professional finish adding both aesthetic and functional value to your property.
#WallRendering #HomeImprovement #UKHomes #DIYRendering #ExteriorDesign #HomeMaintenance
The duration for rendering a wall can vary depending on the size of the wall and weather conditions. Generally it takes 2-3 days for each coat to dry with a total of 2-3 coats needed. So, you can expect the entire process to take about a week, including preparation and drying times.
Rendering is a skill that requires practice to perfect. If you have experience in DIY home projects you might be able to tackle smaller rendering jobs. However, for larger projects or a more polished finish, it's advisable to hire a professional.
The best time for rendering is during mild weather conditions. Late spring to early autumn is ideal, as extreme temperatures, either hot or cold, can affect the drying process and the final result.
The choice of render mix depends on the type of wall and the desired finish. A standard mix is usually one part cement to four parts sand, with lime or plasticiser added for flexibility and workability. For specific requirements or finishes, consult a professional or a local building supply store.
If applied correctly and maintained, rendered walls can last up to 20-30 years. Regular checks and minor repairs can extend the lifespan of the render.
Yes, rendering can improve thermal insulation, especially if you use an insulating render or include an insulation layer beneath the render.
It depends on the surface of the wall. For very smooth or non-porous surfaces, a primer can improve adhesion. However, for most standard brick or block walls, a primer is not necessary.
Rendering over old paint is not recommended as it can affect adhesion. It's best to remove any old paint and prepare the surface properly before rendering.
Small cracks can be filled with a suitable filler or render mix. For larger cracks or structural issues consult a professional.


