midrender logo

What is Rendering a Wall?

Updated April 6, 2023
What is Rendering a Wall

Rendering a wall is a crucial part of construction and home improvement projects. This process not only enhances the aesthetic appeal of a building but also provides protection against harsh weather conditions and improves energy efficiency. In this article, we will delve into the intricacies of wall rendering, including its history, various techniques, materials, costs, and maintenance requirements.

What Exactly is Rendering a Wall?

Rendering is the process of applying a protective and decorative layer of material, such as cement, lime, or acrylic, to the exterior of a wall. The practice dates back centuries and has evolved over time to include modern materials and techniques that provide improved performance and aesthetic appeal.

what exactly is rendering a wall

Types of Rendering Materials

There are several types of rendering materials commonly used today, including:

  • Cement render: A traditional choice, cement render is made from a mixture of sand, cement, and water. It is known for its durability and strength but can be prone to cracking if not properly applied and maintained.
  • Lime render: Lime render is a more eco-friendly and breathable option compared to cement. It is made from lime, sand, and water, and it is known for its flexibility and self-healing properties, making it less likely to crack.
  • Acrylic render: A modern alternative, acrylic render is a pre-mixed material consisting of acrylic resin, cement, sand, and various additives. It offers a wide range of textures and colours, and it is more flexible and less prone to cracking than traditional cement render.
  • Silicone render: Similar to acrylic render, silicone render is a pre-mixed material that incorporates silicone for added water repellency and durability. It is also breathable and available in various textures and colours.

Rendering Techniques

There are several rendering techniques to choose from, including:

  • Traditional rendering: This method involves the manual application of render using a trowel. It typically requires multiple layers and skilled craftsmanship for a smooth finish.
  • Monocouche rendering: Monocouche render is a one-coat, pre-coloured render that is applied using a trowel or spray machine. It offers a faster application process and a lower maintenance finish.
  • Insulated render systems: These systems combine rendering with external wall insulation, providing enhanced energy efficiency and a modern appearance. They can be applied using a variety of materials, including acrylic and silicone render.
Rendering Techniques

Why Should You Render Your Walls?

There are several benefits to rendering your walls, including:

  • Aesthetic appeal: A well-rendered wall can transform the appearance of a property, providing a clean and modern look.
  • Weather protection: Rendering acts as a protective barrier, shielding your walls from the elements and preventing water ingress.
  • Increased energy efficiency: Certain rendering systems, such as insulated render systems, can significantly improve a property's thermal performance, reducing heating costs and carbon emissions.
  • Enhanced property value: A well-maintained, rendered property can increase its value and desirability in the real estate market.
why should you render your walls

How is Wall Rendering Done?

The process of wall rendering consists of three main stages: preparation of the wall surface, application of the render, and finishing touches and curing.

Surface Preparation

Before applying render, the wall surface must be properly prepared:

  1. Clean the wall to remove dirt, debris, and any loose or flaking paint.
  2. Repair any damage, such as cracks or holes, and ensure the surface is sound and stable.
  3. Apply a primer or bonding agent if required, depending on the render material and wall substrate.

Applying the Render

The render is then applied to the prepared surface:

  1. Mix the render according to the manufacturer's instructions, ensuring the correct consistency.
  2. Apply the render using the chosen technique, such as by hand with a trowel or using a machine for spray application.
  3. If necessary, apply multiple layers of render, allowing each layer to partially dry before applying the next.

Finishing and Curing

Once the render has been applied, it's time for the finishing touches and curing process:

  1. Texture and smooth the render to achieve the desired appearance, using tools like a trowel or sponge.
  2. Allow the render to cure according to the manufacturer's recommendations, typically ranging from a few days to several weeks, depending on the material and environmental conditions.
  3. If desired, paint or seal the cured render to enhance its appearance and durability.

Rendering Costs in the United Kingdom

The cost of rendering a wall in the UK depends on several factors, including the type of material, the size and condition of the wall, labour costs, and any additional treatments or finishes.

Factors Affecting Rendering Costs

Key factors that influence the cost of rendering include:

  • Material type: Different rendering materials come at different price points, with more modern materials like acrylic and silicone render generally being more expensive than traditional cement render.
  • Wall size and condition: Larger walls or those in poor condition may require more material and labour, increasing the cost.
  • Labour costs: Hiring a professional renderer will add to the overall expense, but can ensure a high-quality finish.
  • Additional treatments or finishes: Custom finishes, such as textured or coloured render, can increase the cost of the project.

Average Rendering Prices

The table below provides an overview of average rendering prices per square metre for various materials and techniques in the UK.

Material TypeAverage Price Range (per square metre)
Cement Render£40 - £60
Lime Render£50 - £70
Acrylic Render£45 - £65
Silicone Render£55 - £75

Keep in mind that these prices are approximate and can vary depending on factors like location and project complexity. It's essential to get multiple quotes from professional renderers to ensure you're getting a fair price.
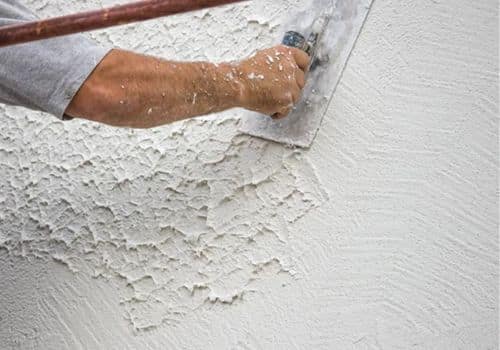
Rendering Costs in the United Kingdom

How to Choose the Right Rendering Material for Your Home

To choose the best rendering material for your home, consider the following factors:

  • Assess your home's needs: Evaluate the condition of your walls, the level of insulation required, and the desired appearance.
  • Climate considerations: Some materials are better suited to specific climates, such as lime render for damp environments or silicone render for areas with high rainfall.
  • Material benefits and drawbacks: Research the various rendering materials and weigh their advantages and disadvantages in relation to your specific needs.
  • Expert advice and consultation: Consult with a professional renderer or architect to determine the most appropriate material and technique for your project.

DIY vs. Hiring a Professional Renderer

While some homeowners may be tempted to tackle wall rendering as a DIY project, there are several factors to consider before taking on the task:

  • Pros of DIY rendering: Savings on labour costs, the satisfaction of completing the project yourself, and the ability to work at your own pace.
  • Cons of DIY rendering: The potential for a lower-quality finish, the risk of damage to your property, and the time-consuming nature of the project.

In most cases, hiring a professional renderer is the best choice for achieving a high-quality, long-lasting result. To find a reliable renderer in the UK, seek recommendations from friends, family, or online review platforms, and always obtain multiple quotes and references.
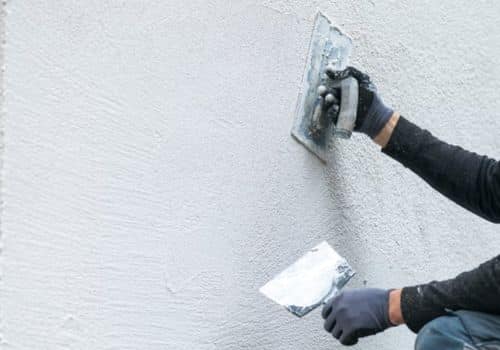
hiring a professional renderer

Maintaining Your Rendered Walls

Proper maintenance is key to ensuring the longevity and appearance of your rendered walls. This includes regular cleaning and inspection, repairing any cracks or damage, and repainting or resealing if necessary.

Cleaning and Inspection

Regular cleaning and inspection of your rendered walls will help maintain their appearance and identify any potential issues:

Clean the walls every 1-2 years, depending on the level of dirt and pollution in your area. Use a soft brush, water, and a mild detergent to gently clean the surface without damaging the render.

Inspect the walls during cleaning for any signs of damage, such as cracks or discolouration, which may indicate underlying problems.

Repairing Rendered Walls

If you notice any damage to your rendered walls, it's essential to address the issue promptly:

  1. Determine whether the damage can be repaired or if the render needs to be replaced entirely. Small cracks or surface damage can often be repaired, while larger issues may require a more extensive intervention.
  2. Employ common repair techniques, such as filling cracks with a suitable filler or patching damaged areas with the same render material.
  3. Decide whether to tackle the repairs yourself or hire a professional, considering the extent of the damage and your level of expertise.

Planning Permission and Building Regulations
in the United Kingdom

Before undertaking a rendering project in the UK, it's essential to understand the planning permission requirements and building regulations that may apply:

Planning permission is generally not required for rendering unless your property is a listed building or located in a conservation area. However, it's always best to check with your local planning authority before beginning any work.

Building regulations may apply to certain aspects of rendering projects, such as insulation requirements or damp proofing. Consult with a professional or your local building control office to ensure compliance with all relevant regulations.

Frequently Asked Questions

Can I paint over a rendered wall?
Yes, you can paint over a rendered wall, provided the render is fully cured and prepared correctly. Use a suitable exterior masonry paint and follow the manufacturer's guidelines for best results.

How long does rendering last?
The lifespan of a rendered wall depends on the material used and the quality of the workmanship. In general, rendering can last between 20 to 40 years if properly maintained.

Is rendering suitable for all types of homes and buildings?
While rendering is suitable for most types of homes and buildings, some exceptions may include historic or listed properties with specific aesthetic or conservation requirements. Always consult with an expert before undertaking a rendering project on a unique or sensitive building.
frequently asked questions about rendering a wall

Conclusion

Wall rendering is a valuable home improvement project that can enhance the appearance, protection, and energy efficiency of your property. By understanding the different materials, techniques, and costs involved, as well as the importance of proper maintenance, you can make an informed decision about the best rendering solution for your home.

More Frequently Asked Questions

The duration of a rendering project depends on factors such as wall size, the material used, and the technique employed. In general, a small to medium-sized wall may take 2-4 days for preparation, application, and finishing. However, curing times can vary from a few days to several weeks, depending on the render material and weather conditions.

Weather conditions can significantly impact the rendering process. It is not advisable to apply render during wet or freezing conditions, as this may cause issues such as poor adhesion, cracking, or longer curing times. Aim to schedule your rendering project during dry and mild weather for the best results.

Rendering can help protect your walls from moisture ingress, but it is not a complete solution for damp problems. If your property suffers from damp, it's essential to address the underlying issues, such as poor ventilation or damaged damp proofing, before applying render.

Rendering and plastering are similar processes, but they serve different purposes and are applied to different surfaces. Rendering is applied to the exterior walls of a building, providing a protective and decorative finish, whereas plastering is applied to interior walls and ceilings to create a smooth, even surface for painting or wallpapering.

Signs that your render may require maintenance or repair include discolouration, cracks, loose or flaking material, or the appearance of damp patches on the interior walls. Regular cleaning and inspection can help identify issues early and prevent further damage.

Author:

Richard Renderman, your trusted rendering expert at MidRender, is passionate about the art of rendering. With years of experience,he crafts…

Explore articles by Richard Renderman
Connect with Richard Renderman on Social Media
Share This Article

Professional house rendering services

Get a free no obligation quote today!

our services 24 hours a day and seven days a week so that the clients can get their job done on time without any delay or compromise on quality. 24/7/365 support.
Get a free no obligation quote today!

Other Categories

THERE’S MORE TO READ.

2024 Midrender.co.uk
linkedin facebook pinterest youtube rss twitter instagram facebook-blank rss-blank linkedin-blank pinterest youtube twitter instagram