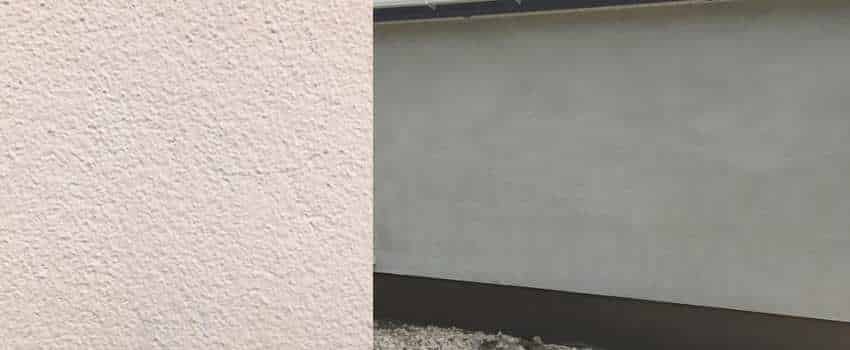
Sand and cement render is a building technique used to finish the exterior walls of a building, or to repair and renew the existing render. This type of render is made from a mixture of sand, cement, and water, and is applied to the surface of the wall in a thick, even layer. The render is then left to dry and set, creating a hard, durable surface that is both weatherproof and attractive. Sand and cement render is commonly used on brick, concrete, or stone walls, and can be applied either by hand or with a machine. To achieve a professional-looking finish, it is important to follow the correct mix ratio, apply the render evenly, and to allow sufficient time for it to dry and cure.
The process of sand and cement render typically involves the following steps:
1. Preparation
2. Mixing the render
3. Applying the render
4.Finishing the render
5.Painting or Decorating
Before starting the render, it is important to prepare the surface of the wall by removing any loose or damaged mortar or render, and cleaning the surface of any dirt, dust, or debris. It may also be necessary to repair any cracks or gaps in the wall, or to apply a bonding agent to help the render adhere to the surface.
Mixing the render: Sand and cement render is made by mixing sand, cement, and water together in a specific ratio, which will depend on the type of wall and the intended use of the render. It is important to carefully measure the ingredients and mix them thoroughly to ensure an even consistency.
Applying the render: The render is then applied to the wall in a thick, even layer using a trowel or a render machine. The render should be applied in sections, starting from the bottom of the wall and working upwards. The first layer of render should be applied evenly and left to set for a few hours before applying a second layer.
Finishing the render: After the second layer of render has been applied, it is important to finish the render to ensure a smooth, even surface. This may involve using a float or a trowel to smooth out any rough patches or to create a textured finish. The render should then be left to dry and set for at least 24 hours, or longer if the weather conditions are particularly damp or humid.
Painting or Decorating: After the render has dried and set, it can be painted or decorated to match the rest of the building. It is important to use a suitable paint or decorating material that is compatible with the render and that is designed for exterior use.
It is important to follow the manufacturer's instructions and to take appropriate safety precautions when carrying out sand and cement render, as the process can be physically demanding and may involve the use of heavy or hazardous materials. If you are unsure about any aspect of the process, it is recommended to seek advice from a professional builder or render specialist.
K render and sand and cement render are two different types of exterior wall finishing techniques used in building construction.
K Render: K render is a type of exterior wall finish that is made from a mixture of Portland cement, sand, and a polymer-based admixture. It is a modern and flexible type of render that can be applied to a variety of surfaces, including brick, concrete, and stone. K render is known for its strength, durability, and versatility, and is commonly used to improve the appearance of walls, to repair damaged render, and to provide weatherproofing.
Sand and Cement Render: Sand and cement render is a traditional type of exterior wall finish made from a mixture of sand, cement, and water. It is a more basic and cost-effective option than k render, and is commonly used for repairing existing render or for finishing walls in a traditional or classic style. Sand and cement render is a relatively simple process and can be applied either by hand or with a machine, but it is not as flexible or long-lasting as k render.
Both k render and sand and cement render have their advantages and disadvantages, and the choice between the two will depend on factors such as the type of wall, the intended use of the render, and the desired look and finish. It is important to consider these factors and to seek advice from a professional builder or render specialist before choosing which type of render is best for your project.
A short video: Process of Sand And Cement Render
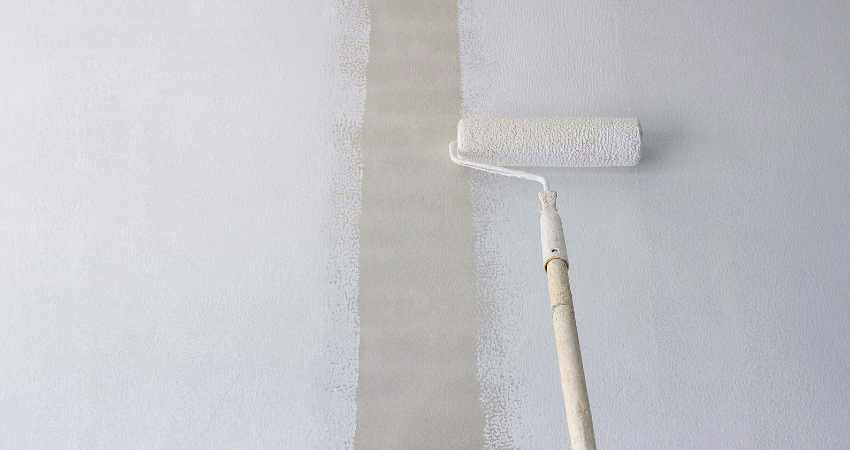
How to paint sand and cement render
To paint sand and cement render, you will need to follow these steps:
1.Clean the surface
2.Repair any cracks or gaps
3.Prime the surface
4.Apply paint
5.Repeat
Clean the surface: Before painting, it is important to clean the surface of the render thoroughly to remove any dirt, dust, or debris. Use a pressure washer or a strong jet of water to clean the surface, or use a scrub brush and a mild detergent solution to clean by hand. Allow the surface to dry completely before painting.
Repair any cracks or gaps: If there are any cracks or gaps in the render, it is important to repair these before painting. Fill any cracks or gaps with a suitable filler, such as a cement-based filler, and allow the filler to dry completely.
Prime the surface: After cleaning and repairing the surface, it is important to prime the render before painting. Use a suitable primer that is designed for use on sand and cement render, and apply a thin, even coat of primer to the surface. Allow the primer to dry completely before painting.
Apply paint: Once the primer has dried, you can start to paint the render. Use a paint that is suitable for use on sand and cement render, and is designed for exterior use. Apply a thin, even coat of paint to the surface, working in sections and starting from the top of the wall and working downwards.
Repeat: Depending on the type of paint and the desired finish, it may be necessary to apply a second or third coat of paint. Allow each coat of paint to dry completely before applying the next coat.
It is important to follow the manufacturer's instructions and to take appropriate safety precautions when painting sand and cement render. If you are unsure about any aspect of the process, it is recommended to seek advice from a professional builder or painting specialist.
What is sand and cement render?
Sand and cement render is a type of exterior wall finish made from a mixture of sand, cement, and water. It is typically used to provide a protective and decorative layer on the outside of a building and is commonly applied to walls made of brick, stone, or concrete. Sand and cement render is a relatively simple and cost-effective option for finishing the exterior of a building, and can be used to achieve a variety of looks, from traditional to modern. It is a durable and long-lasting option, although it is not as flexible or as modern as other types of exterior wall finishes, such as k render.
Sand and cement render has a number of benefits, including:
Durability: Sand and cement render is a durable and long-lasting option for finishing the exterior of a building. It can withstand exposure to the elements and can provide a protective layer for the underlying wall.
Cost-effective: Sand and cement render is a relatively simple and cost-effective option for finishing the exterior of a building. It is a popular choice for budget-conscious home-owners or builders.
Versatility: Sand and cement render can be applied to a variety of surfaces, including brick, stone, and concrete, and can be used to achieve a range of looks, from traditional to modern.
Easy to apply: Sand and cement render is a relatively simple process that can be applied either by hand or with a machine. It is also easy to maintain and repair if required.
Improved appearance: Sand and cement render can improve the appearance of a building by providing a clean and uniform finish. It can also be painted or tinted to match the existing décor.
Weather protection: Sand and cement render can provide protection from the elements, such as rain, wind, and sun. This helps to keep the underlying wall and interior of the building dry and protected from damage.
It is important to note that sand and cement render is not suitable for every building, and it may not be the best option for homes or buildings in areas with extreme weather conditions. It is recommended to seek advice from a professional builder or render specialist before choosing sand and cement render as the finish for your building.
How long does sand and cement render take to dry?
The drying time of sand and cement render can vary depending on several factors, including the weather conditions, the thickness of the render, and the type of cement used. On average, it takes 24 to 72 hours for sand and cement render to dry completely.
However, it is important to note that the surface of the render may appear dry to the touch after a few hours, but the inside may still be wet. In general, it is recommended to wait at least 24 hours before applying a second coat of render or starting any painting or decorating work.
It is also important to keep the render protected from rain, wind, and sun exposure during the drying process. This will help to ensure that the render dries evenly and correctly, and that the surface remains smooth and crack-free.
If the weather conditions are hot and dry, the render may dry more quickly, but if it is humid or wet, it may take longer. It is always a good idea to consult a professional builder or render specialist for specific drying times, as well as any other recommendations for working with sand and cement render.
What are the most common problems with sand and cement render?
Some of the most common problems with sand and cement render include:
1.Cracking
2.Shrinkage
3.Efflorescence
4.Discoloration
5.Poor adhesion
6.Chalking
Cracking: Sand and cement render is prone to cracking, especially if it is not applied properly or if the surface is not properly prepared. This can be due to a number of factors, including thermal movement, ground movement, or lack of reinforcement.
Shrinkage: Sand and cement render can shrink as it dries, which can lead to cracks or gaps in the surface. This is often due to the mix being too dry or not being applied correctly.
Efflorescence: This is a white, powdery substance that can appear on the surface of sand and cement render. It is caused by salts that leach out of the mortar and is often a sign of moisture problems.
Discoloration: Sand and cement render can discolor over time, especially if it is exposed to harsh weather conditions or if it is painted with the wrong type of paint.
Poor adhesion: If the surface is not properly prepared or if the mix is not the correct consistency, sand and cement render may not adhere properly to the wall, resulting in peeling or flaking.
Chalking: This is a common problem with sand and cement render, where the surface becomes powdery and the color fades. It is often a sign of weathering or exposure to harsh conditions.
To minimize these problems, it is important to use the right materials, follow the correct application procedure, and seek advice from a professional builder or render specialist. Regular maintenance and cleaning can also help to keep sand and cement render looking good and protected from damage.
What are some tips for working with sand and cement?
Here are some tips for working with sand and cement render:
Preparation: Make sure the surface is clean, dry and free from any loose material or debris. Any cracks or gaps should be filled before applying the render.
Mixing: Mix the sand and cement to the correct consistency, making sure the mix is not too dry or too wet. Follow the manufacturer's instructions for the best results.
Application: Apply the render in thin, even coats, making sure to work it into the surface. Use a straight edge to level the surface and remove any air bubbles.
Drying: Allow the render to dry completely before applying a second coat or starting any painting or decorating work. Keep the render protected from rain, wind, and sun exposure during the drying process.
Finishing: Finish the render with a trowel or a float to achieve a smooth, even surface. If necessary, sand the surface lightly to remove any rough edges.
Painting: If desired, paint the render with a high-quality exterior paint. Make sure to choose the right type of paint for the surface and follow the manufacturer's instructions for the best results.
Maintenance: Regularly clean and maintain the render to keep it looking good and protected from damage. Repair any cracks or damage as soon as possible to prevent further issues.
By following these tips and seeking advice from a professional builder or render specialist, you can ensure that your sand and cement render is applied correctly and lasts for many years.
Final Thoughts of sand and cement render
Sand and cement render is a durable, low-maintenance and cost-effective option for wall finishes. When applied correctly, it can create a smooth, even surface that looks great and provides protection from the elements. However, it is important to use the right materials, follow the correct application procedure, and seek advice from a professional builder or render specialist to ensure the best results. Regular cleaning and maintenance can also help to keep the render looking good and protected from damage.
Overall, sand and cement render is a versatile and reliable option for those looking to improve the look and durability of their walls. By following best practices and seeking professional advice, you can ensure that your sand and cement render is long-lasting and looks great for many years to come.
Richard Renderman, your trusted rendering expert at MidRender, is passionate about the art of rendering. With years of experience, he crafts informative and engaging blog posts to share his knowledge with you. Richard's objective is to make the realm of rendering accessible and exhilarating, contributing one post at a time.
our services 24 hours a day and seven days a week so that the clients can get their job done on time without any delay or compromise on quality. 24/7/365 support.