
Rendering exterior walls is a practical skill that can enhance the durability and aesthetic appeal of a building, but it often comes with challenges, especially if you’re new to it. Here are some tips to help beginners achieve a professional-looking render, even if it’s your first time.
When it comes to rendering, starting with the right tools is essential. A steel trowel is commonly used, though it’s sometimes called a float. The choice of rendering mix is equally important. For beginners, I suggest a mix with a bit of lime and sharp sand. Lime adds flexibility and can self-repair small cracks over time, which is a lifesaver for beginners who might not achieve a perfect first coat.
Tip: For a balanced mix, try using five parts of sand, one part cement, and one part lime. This creates a durable, workable mix, reducing issues like cracking and adding longevity to the render.
The scratch coat, or the first coat, is a thicker base layer. This layer should be applied with care to ensure it adheres to the wall effectively. Starting from the bottom and working upward, apply the mix using a trowel or float. Some prefer spreading the render horizontally, while others like to move vertically. Choose the technique that feels most comfortable for you, but ensure it’s evenly spread.
Scratch Coat Tips:
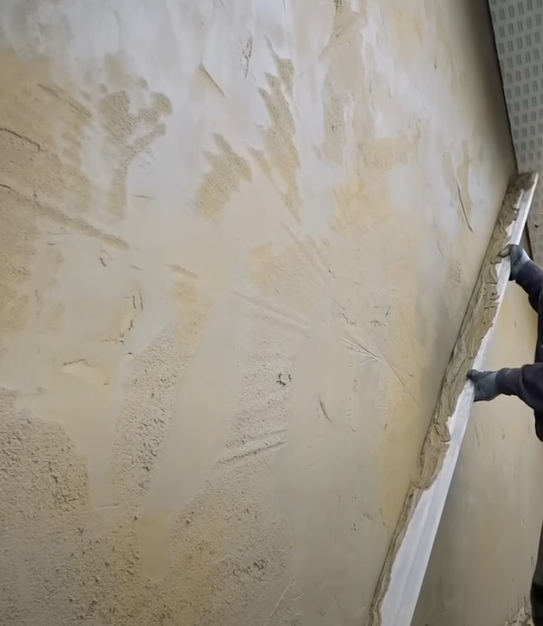
Once the scratch coat is on, check the surface to ensure it’s even. The key here is to avoid noticeable lumps, as these will become more apparent once the final coat is applied. Use a straight edge to gently scrape across the surface, identifying any high spots and filling any low areas with more render.
Pro Tip: When smoothing the surface, wait until the render firms up slightly but isn’t completely dry. This makes it easier to manage high and low spots without removing too much material.
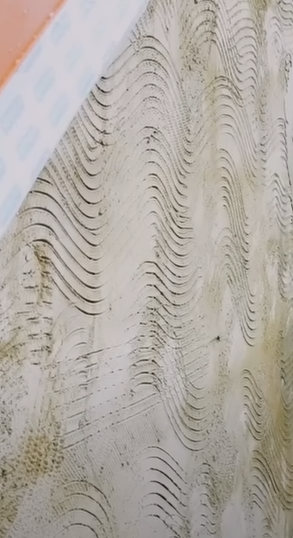
With the scratch coat applied, it’s essential to add some texture, which gives the top coat something to adhere to. Using a scratcher or comb, make wavy horizontal lines instead of straight ones. Wavy lines prevent vertical cracking and offer better adhesion for the top coat as it shrinks.
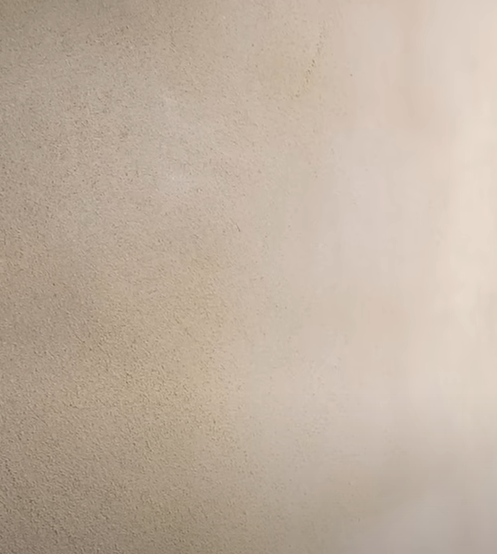
The top coat is a thinner layer than the scratch coat and should ideally be applied after the scratch coat has dried for at least 24 hours. The mixture for the top coat can be slightly different, often a 5:1 mix (five parts sand to one part cement) for added smoothness.
Application Tips:
Using lime in your mix can make all the difference, especially for beginners. Lime allows the render to “breathe,” reducing the risk of cracks. This also means that any tiny hairline cracks may repair themselves over time, which can be particularly beneficial for novices still mastering their technique.
Rendering in the right weather conditions is crucial. Avoid rendering in hot weather, as it can cause the mix to dry too quickly, leading to cracks. If you must render on a hot day, soak the wall well before you start and periodically dampen it as you work. On rainy days, cover the render with a simple shelter to protect it until it’s dry.
Rendering may seem daunting at first, but with patience and practice, you’ll gain confidence in achieving a smooth, professional finish. By following these steps and using the right tools, you’ll be able to render like a pro. Remember, the scratch coat lays the foundation, while the top coat delivers the final finish. Keep these layers balanced and follow a methodical approach to bring the best results.
Hopefully, these tips guide you through your first rendering project. If you’re looking for expert rendering services or more beginner-friendly tips, explore our blog at MidRender
For beginners, a balanced mix with five parts sand, one part cement, and one part lime is recommended. Lime adds flexibility and self-repairing qualities, which help prevent cracks, making it easier to manage for new renderers.
Essential tools include a steel trowel (often called a float), a straight edge, a scratcher or comb, and a sponge for finishing touches. Optional tools like a urethane float or European derby can help achieve a smoother, professional finish.
The scratch coat, or base layer, should ideally be around 8mm thick. This provides a sturdy foundation for the top coat while reducing the risk of cracking.
Wavy lines provide better adhesion for the top coat, reducing the risk of vertical cracks by allowing the render to grip the wall more effectively as it dries and shrinks.
It’s best to apply the top coat after the scratch coat has dried for at least 24 hours. Waiting ensures that the scratch coat is firm enough to support the final layer, leading to a more durable finish.
Use a sponge to gently blend any imperfections. For a more even finish, a urethane float or European derby can help level out high and low spots without removing too much material.
Yes, lightly dampening the wall can improve adhesion. If it’s a hot day, soak the wall before starting, as this prevents the mix from drying too quickly, which can cause cracking.
Ideally, render in mild weather. Hot weather can dry the mix too quickly, and rain can damage the finish if the render hasn’t set. On rainy days, consider covering your work with a temporary shelter to protect the render.
Lime enhances the flexibility of the render, allowing it to “breathe.” This reduces the risk of cracks and even enables the render to self-repair small cracks over time, making it more beginner-friendly.
Use a straight edge tool to run across the surface. High spots will be visibly removed, while low spots can be identified and filled as needed. This step is essential for a smooth final finish, especially in areas that catch direct sunlight.


